Introduction
Steamcrave are a little different from other manufacturers in so many ways, and that’s what makes their products fascinating, so I was very happy but a little scared when this 30mm, 12ml behemoth arrived.
Product overview
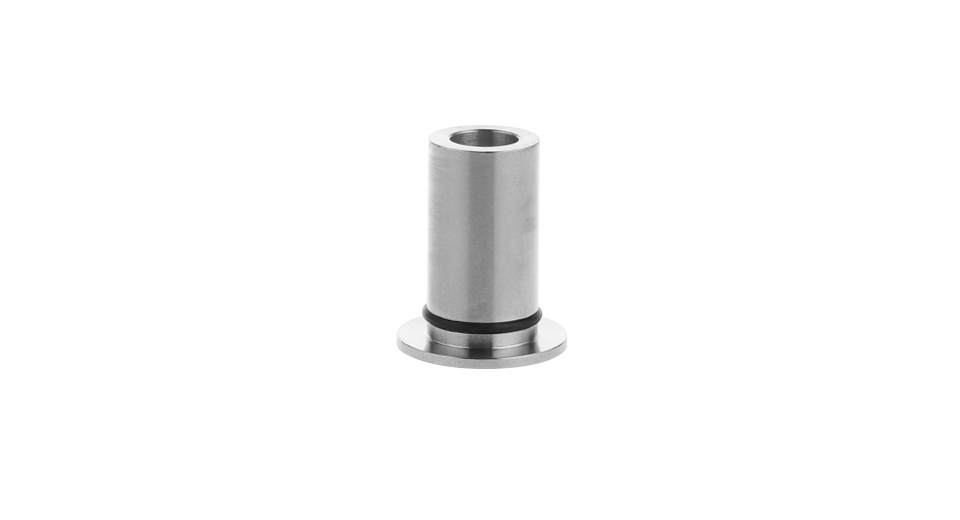
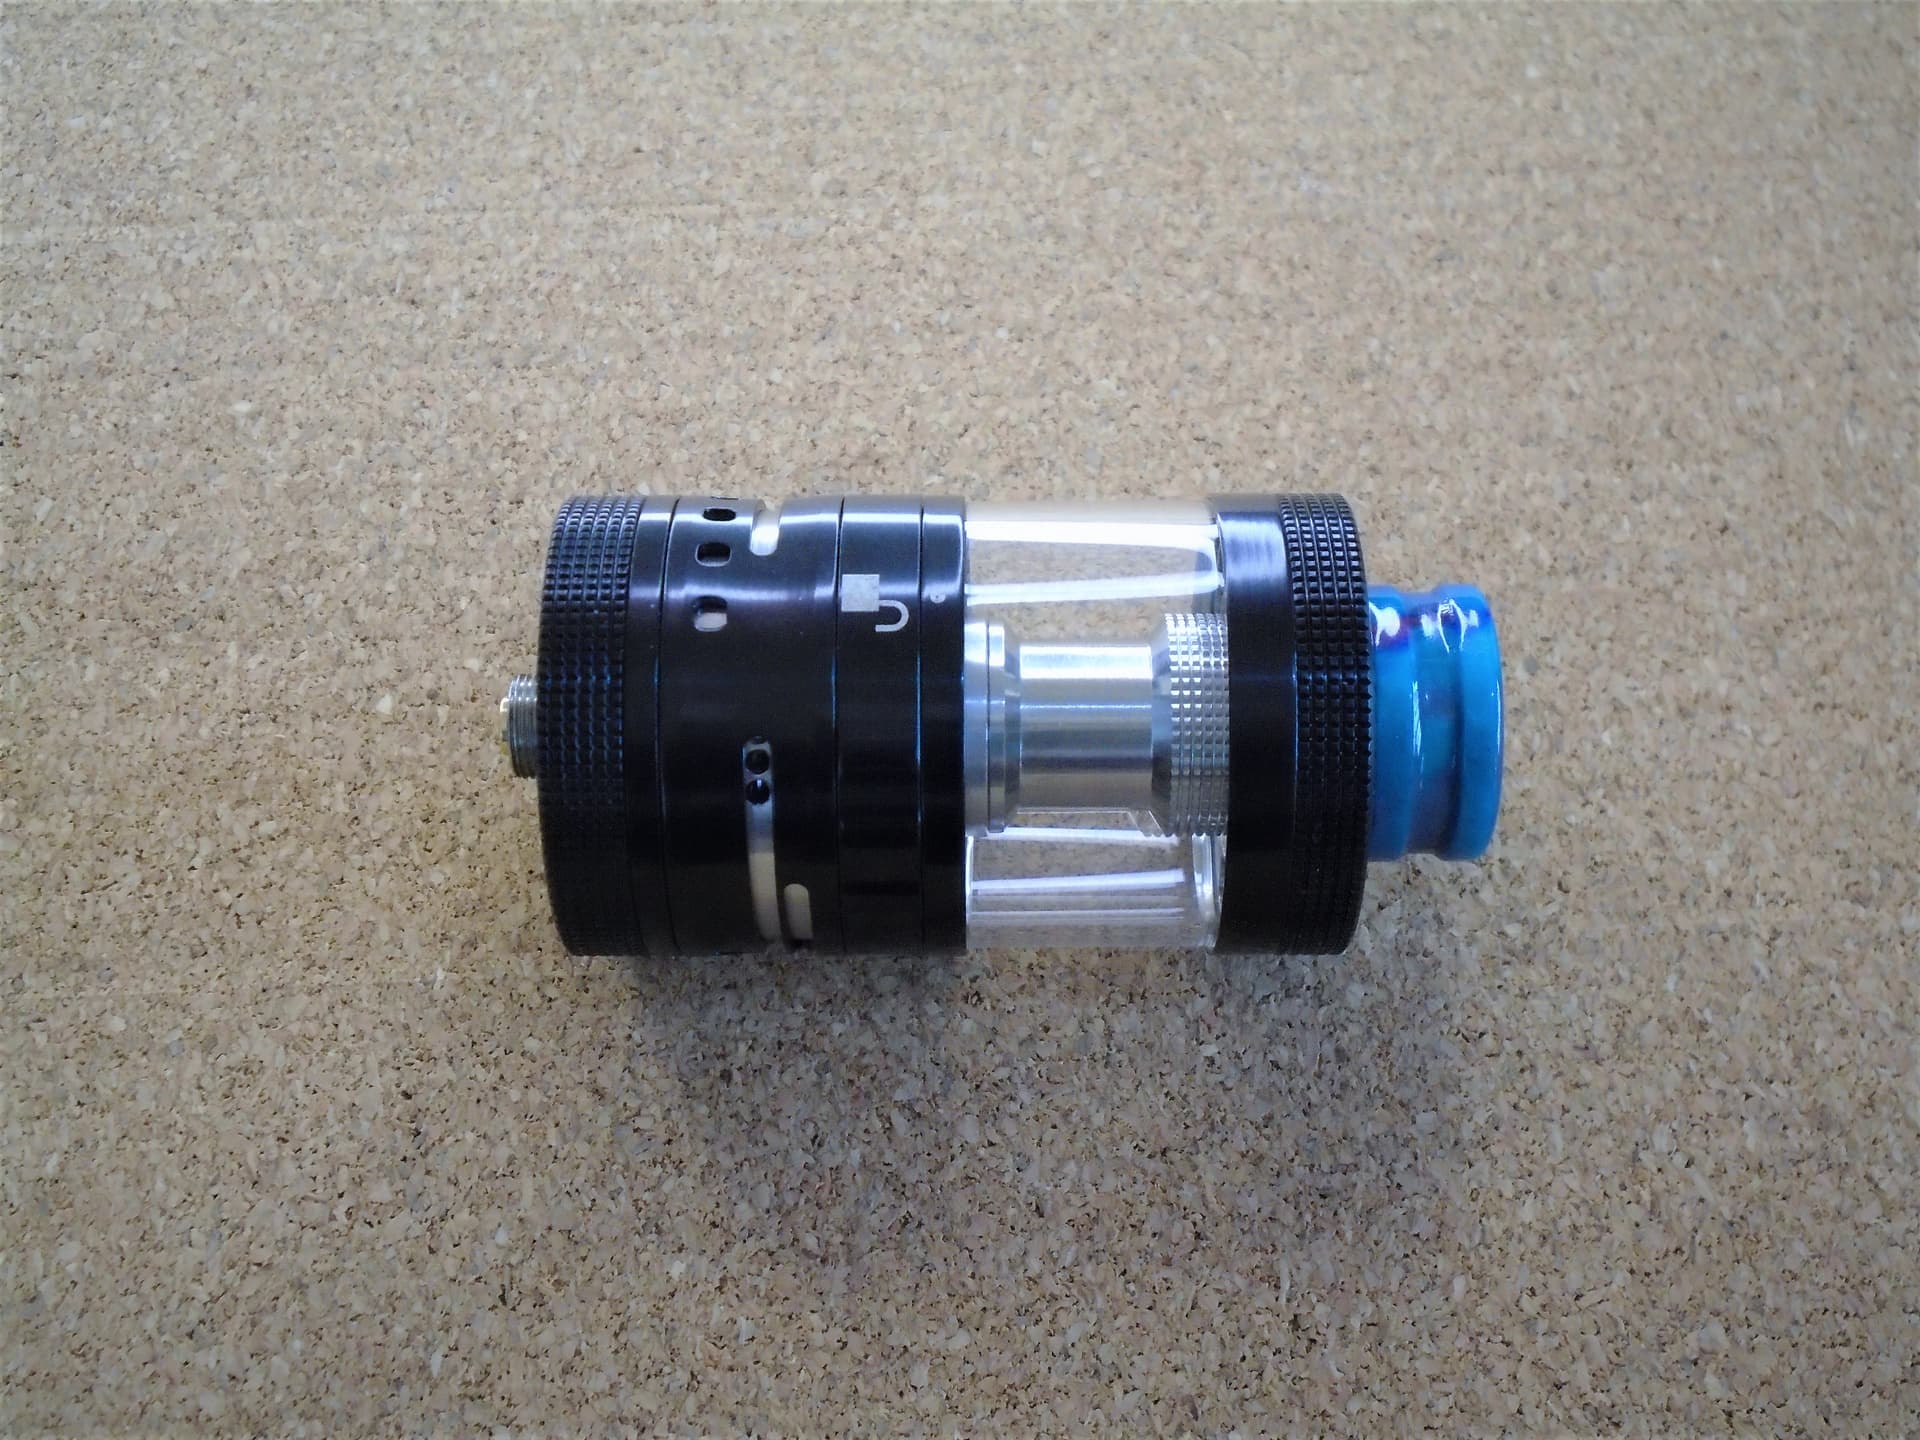
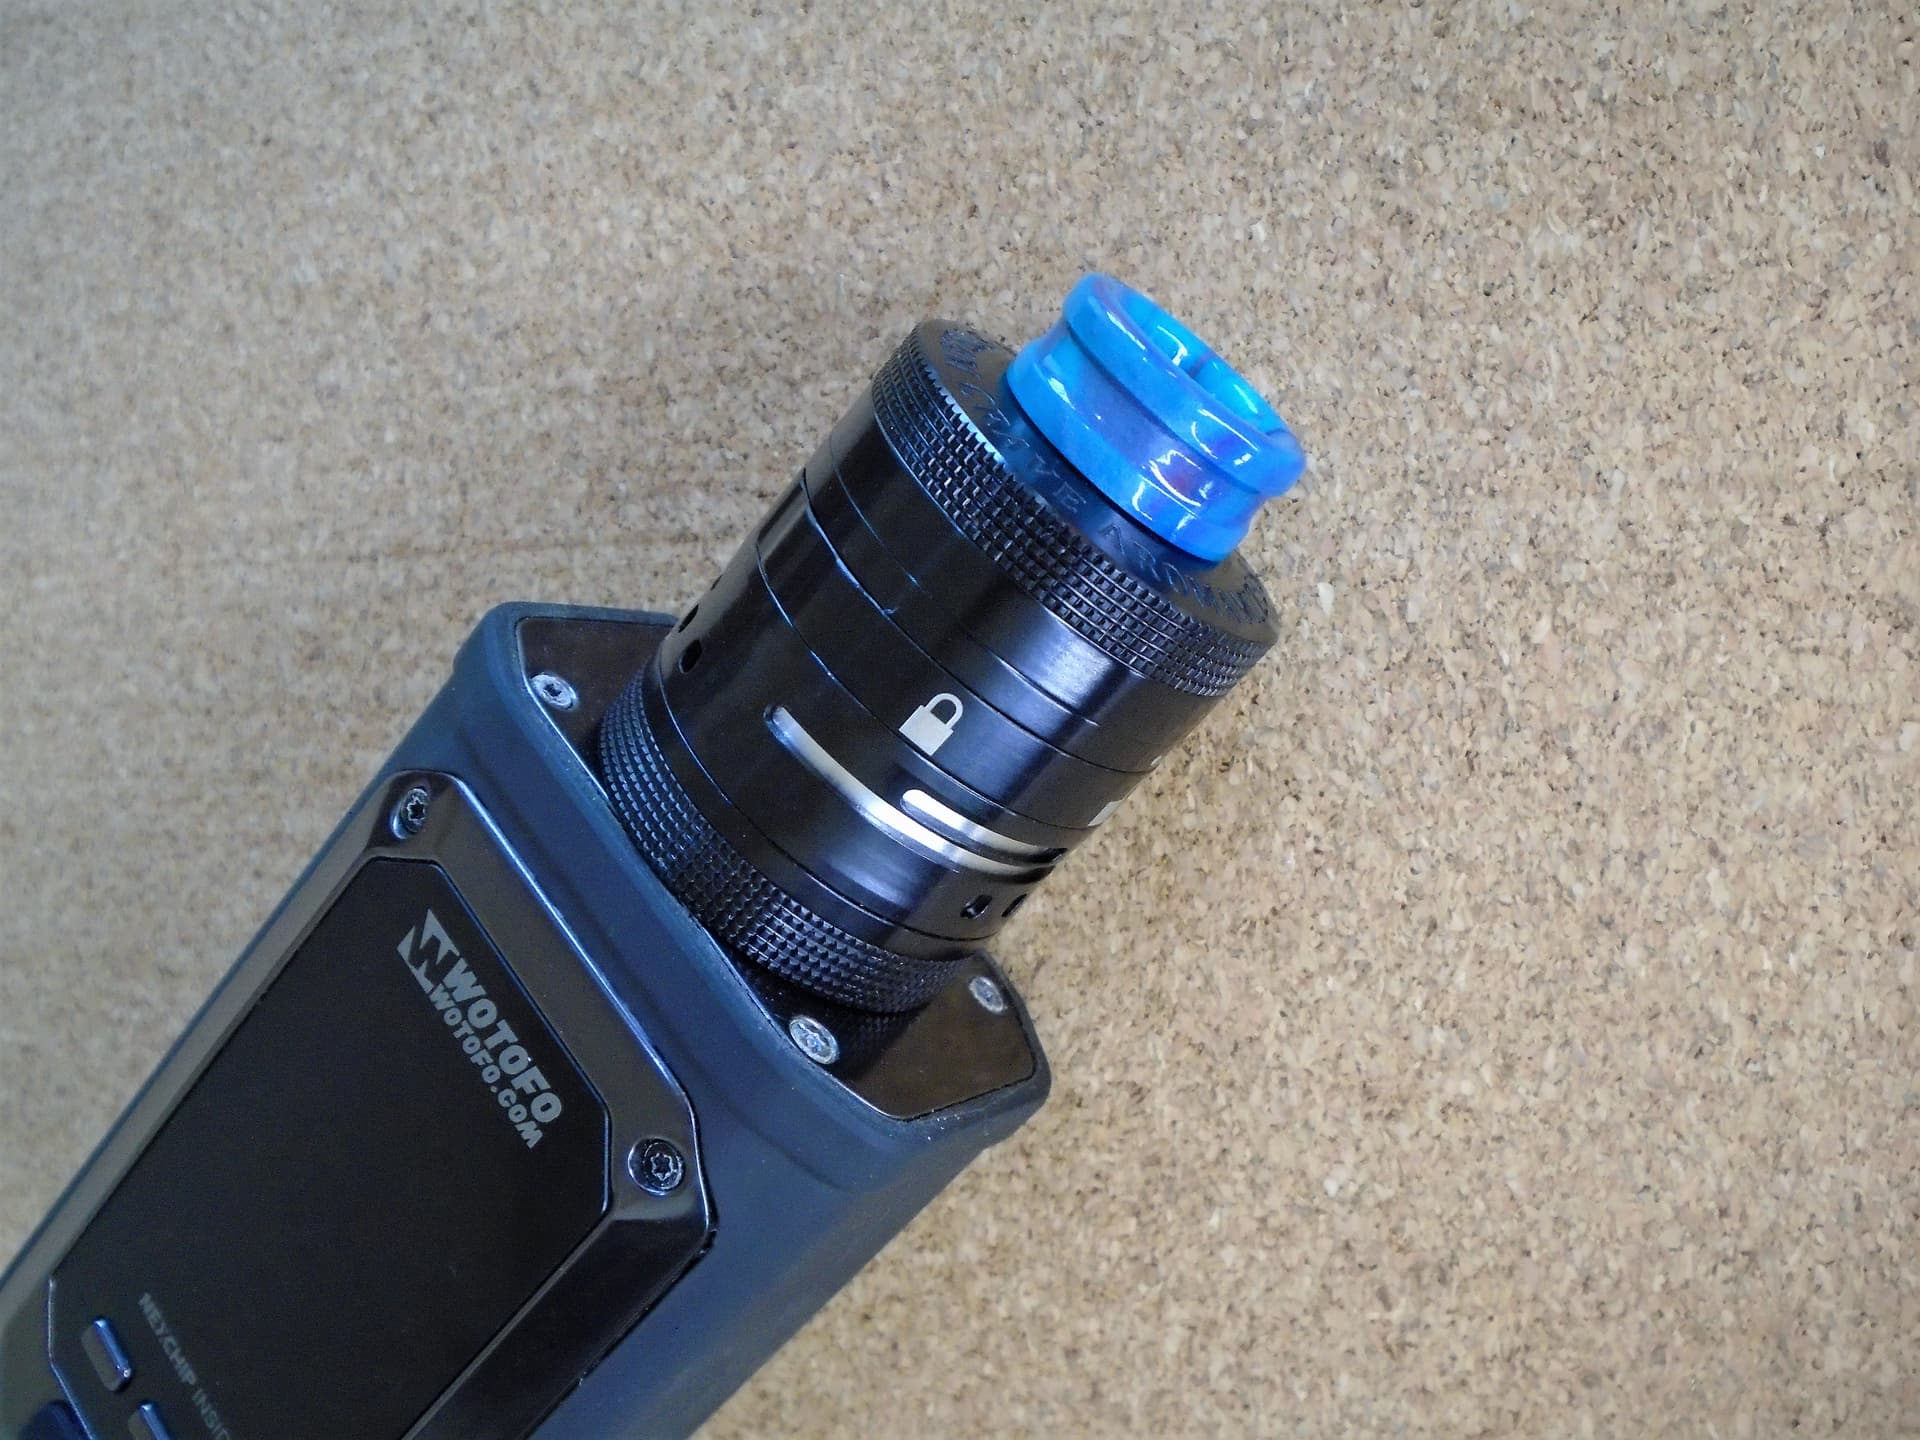
The Aromarizer Plus V3 is a 30mm RDTA, with bottom+side airflow, juice-flow control and a 12ml juice capacity.

More images are here
What do you get?
- Aromamizer Plus V3 RDTA
- Spare 12ml glass tank
- Spares
- Sticker/vapeband
No coils/cotton isn’t a huge issue, but still I’d have preferred to have both included.
First impressions
Obviously it’s a huge 30mm tank – but then again compared to other Steamcrave tanks like the Ragnar and Titan, it’s one of their more conservative designs.
The aesthetics are very industrial, with deep knurling on the top-cap and base, the logo on the top-cap and the printed markings for the juice-flow control ring.
The build quality is really a level above most mainstream atomizers that I’ve used, everything is intricate and over-engineered, the juice-flow and airflow-control rings have nice movement and the threads are smooth.
One thing confused me though, is it an RDTA or an RTA? In my eyes, it’s an RTA.
Build
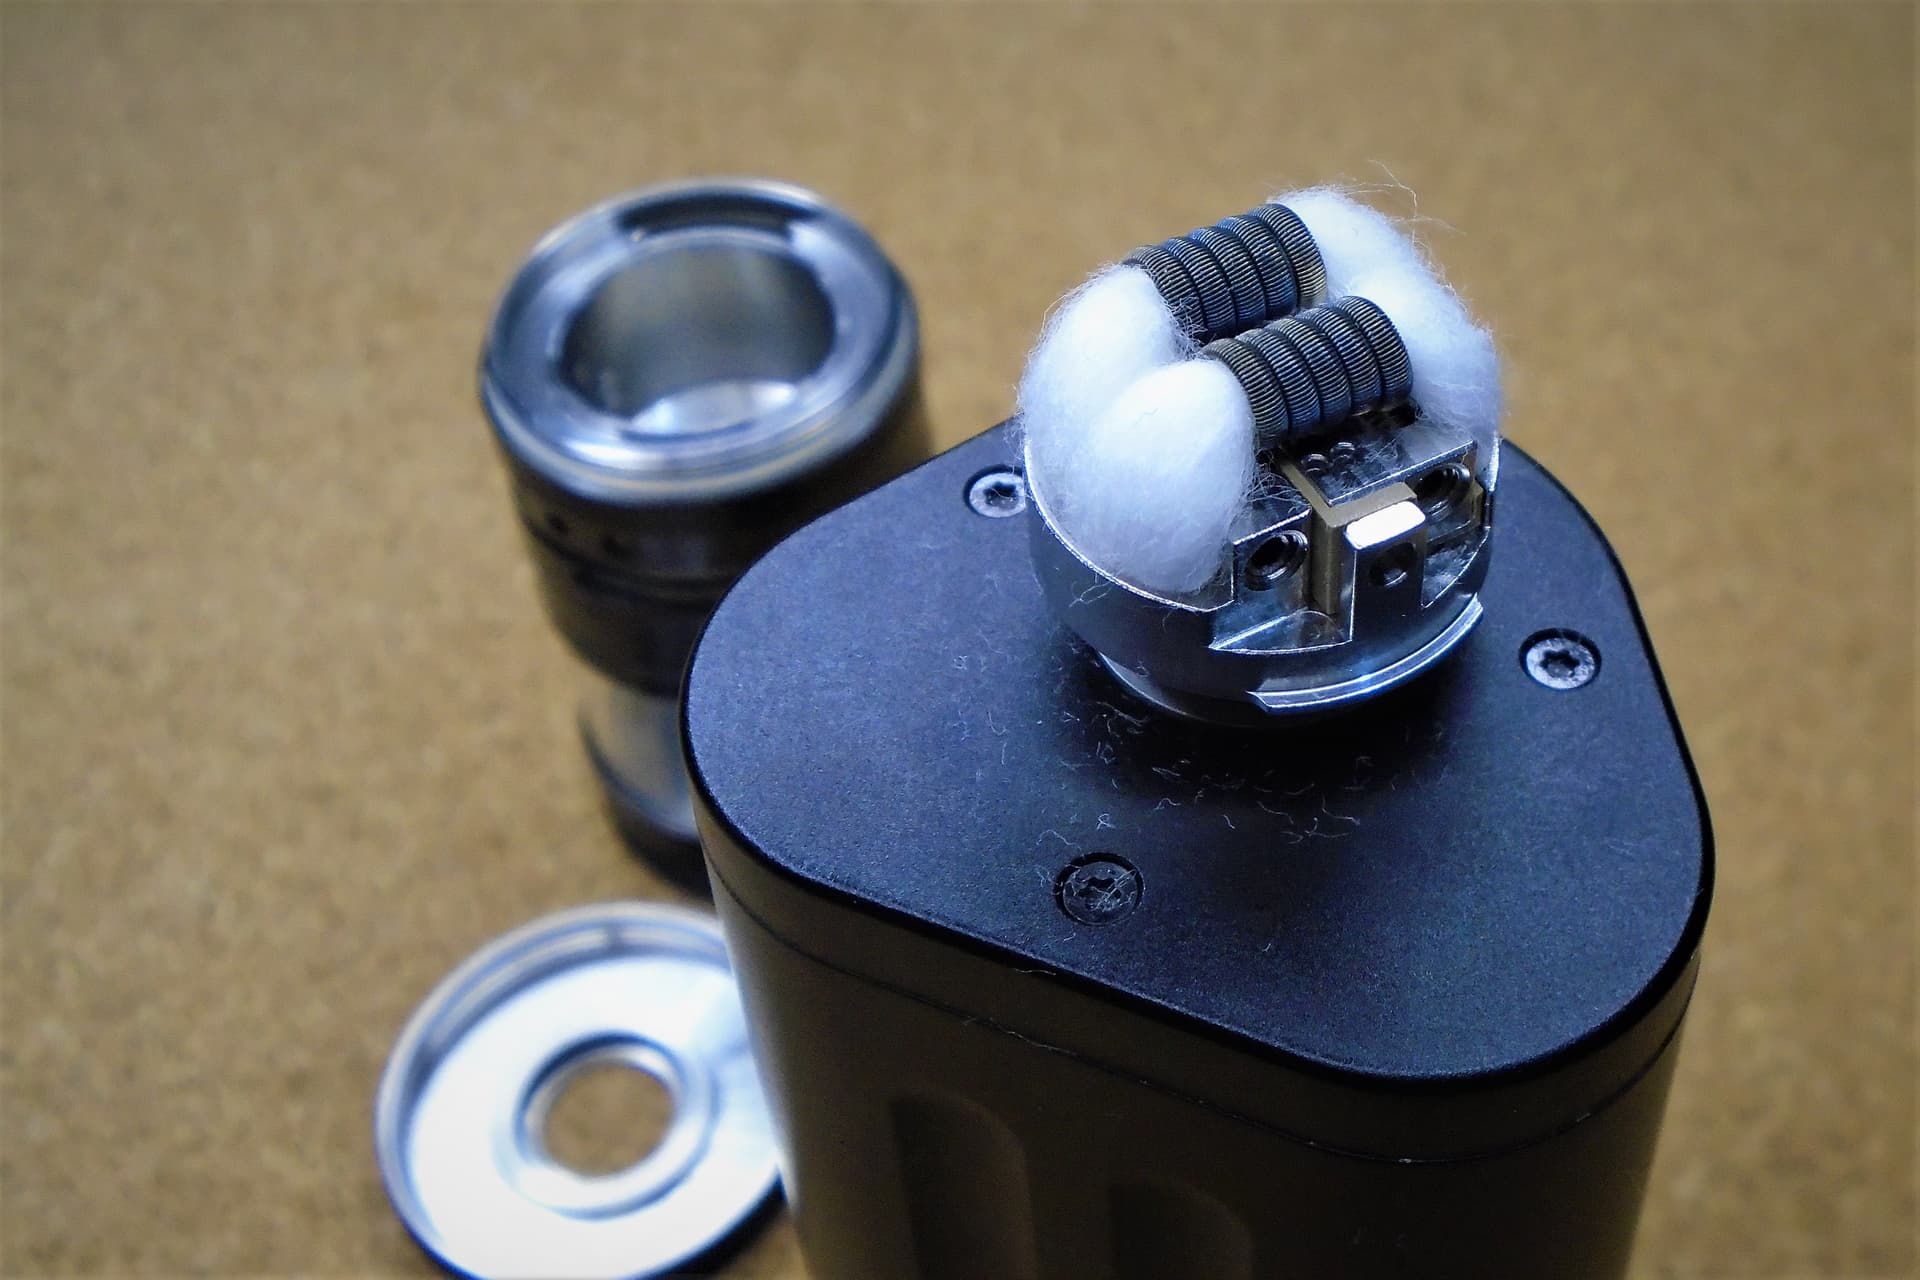
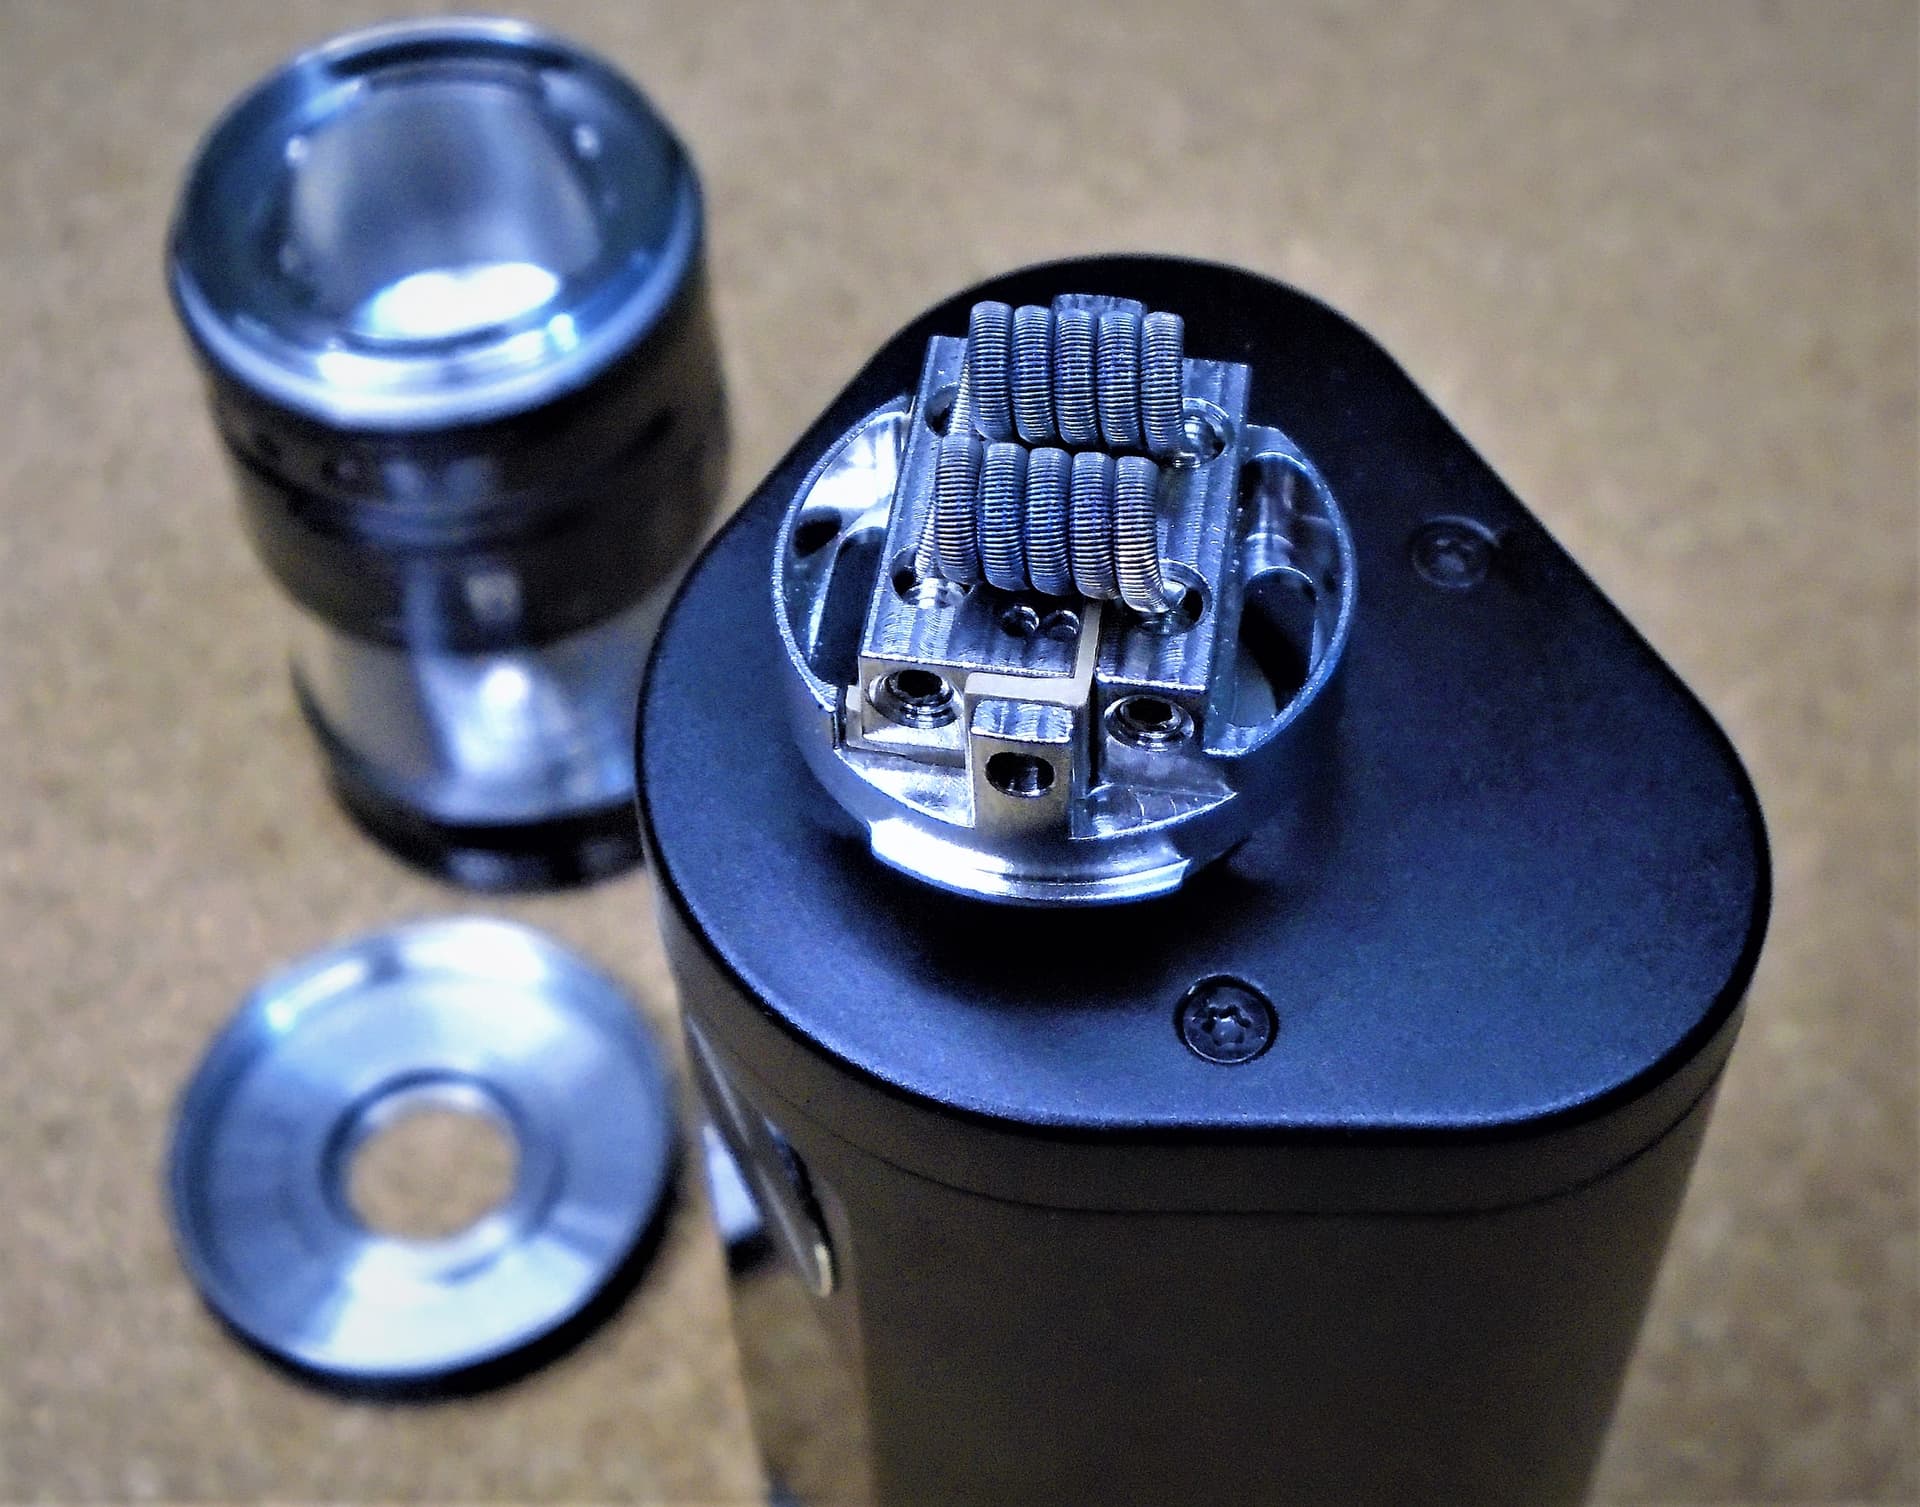
To access the deck, you have to remove the knurled base of the tank and then pull the deck section downwards, then mount the deck on your mod.
Pre-cut the coil leads, drop them into the postless deck, tighten everything, align the coils and finally remove any hot spots. I tried a few different lead lengths, and found that 5.0-5.5mm worked really well for the coils that I was using.
While putting the coils in is a very familiar experience for anyone who has used a postless deck before, the wicking is a little different, as the juice comes in from under the deck, rather than from the side. You have to make sure that the two slots in the bottom of the deck and covered with cotton, with the cotton remaining within the deck, not poking out. It look me a couple of attempts to get it perfect, but once you work it out, it’s a very simple process. The thing is, that even if your wicking isn’t perfect, it still vapes and tastes fine – but when it’s perfect you end up getting a 100w juicy chain-vaping beast of a tank.
Once you’ve got the wicking complete, juice it up, remove the deck from the mod, put the base back into the tank and tighten up the base. There are notches so the base can only be fitted the correct way, this ensures that the airflow lines up correctly with the coils.
Before filling the 12ml tank, close the juice-flow control – you don’t want the pressure caused by that much juice causing major deck flooding or even worse having 12ml of juice coming through your airflow. Once the tank is full and the top-cap is on, open the juice-flow control and watch as 3ml of the juice bubbles into the base of the tank.
How does it perform?
- 2 x dual-coil fused claptons 3.0mm - these coils came to 0.17 for the pair, and the leads were cut to 5.0mm. The flavor was good, as was the vapor production, but it seemed to reach its limit at about 80w. This build worked well with airflow anywhere from slightly closed down to very closed down.
- 2 x quad coil fused claptons 3.0mm - these coils came to 0.14 for the pair and the leads were cut to 5.0mm. With this build, the Aromarizer came alive – it gives a nice cloudy vape and a lot of flavor. Start at 75w and it’s good, push it up to 100w and it’s equally good – this build worked really well with the airflow slightly closed down to fully open.
The only downside to the performance, is that it’s drinks juice at quite a fast rate – but when you have 12ml capacity, this is less of an issue.
Airflow
Comparing the airflow to two other atomizers that offer independently adjustable bottom/side airflow – the Fat Rabbit and Lindwurm, the Steamcrave is just better. The Fat Rabbit is easily adjusted, but relies on two airflow-control rings, the Lindwurm has a single airflow-control ring, but it’s hard to see exactly how you’ve set it and as a result it’s slightly awkward to adjust. The Aromarizer Plus V3 combines the Fat Rabbit’s ease of use and the Lindwurm’s ingenious single ring system, without any of the drawbacks.
RDA mode
It can be converted into an RDA with a 3ml juice well. However, I’d rather take full advantage of the 12ml juice capacity in tank mode.
Accessories
The Aromarizer Plus V3 is compatible with decks from the previous V1 and V2, however this will restrict you to using side airflow only.
There is also an expansion kit giving you 14ml straight glass and 18ml bubble glass options in one pack.
Conclusion
The Aromarizer Plus V3 has so much going for it – it’s just as capable of a restricted DL 50W vape as a 100w open DL vape, with every combination of coil/airflow/wattage giving great flavor.
Add to that the fact that it looks spectacular and is very well made means that you’re on to a winner.
The only negative points that I can think of, are that you might have to make a few attempts before you get the wicking perfect and that it’s going to look silly on any mod that doesn’t take a 30mm atomizer.
Disclaimer
The Aromarizer Plus V3 was sent to me by Steamcrave for the purposes of this review.