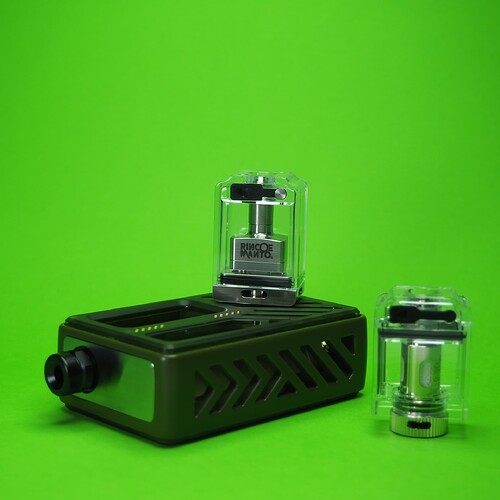
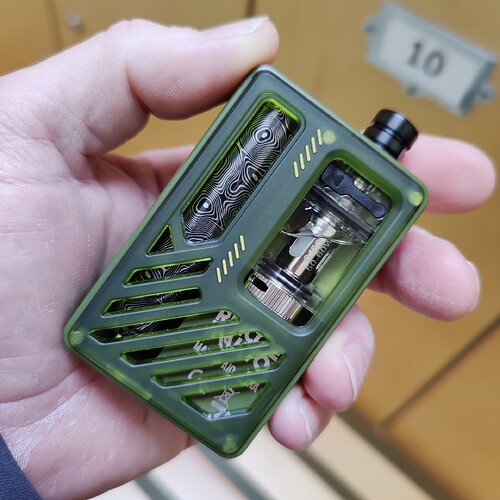
Welcome everyone to the Rincoe Manto AIO Ultra kit review by yours truly. I received the green army coloured edition from Sourcemore for the purpose of the review.
What’s in the box?
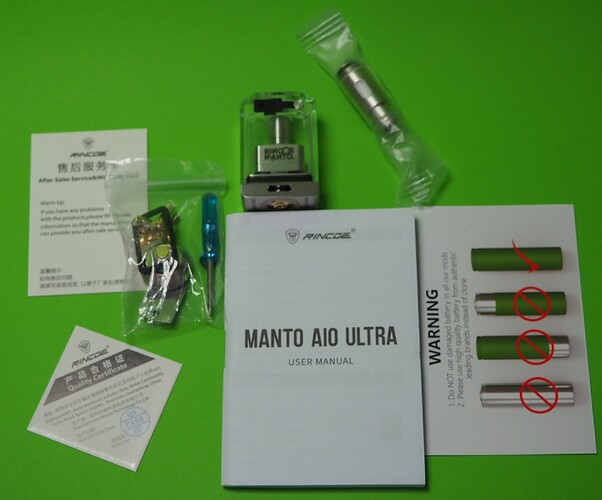
Loads actually! you get the following.
- Manto AIO 80 Watt device
- 2 Mesh coils 0.15Ohm & 0.3Ohm preinstalled in the stock coil tank
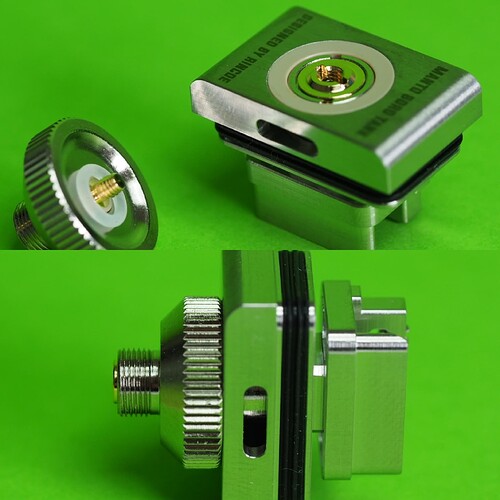
- A spares bag including, post screws, User manual and battery warning card, QC card, rubber gaskets, spare o-rings, 510 adapter for the RTA deck. And 3 AFC pins with a small tool for removing them.
Specs & Fatures
-
10-80W Output Range
-
Smart/RBA Mode
-
Manto 2.0 Chip
-
Adjustable Airflow System
-
Dimension: 80 * 52.5 * 26.6 mm
-
Powered by Single 18650 Battery(Not Included)
-
Compatible with All Manto AIO Coils
-
BORO Compatible
-
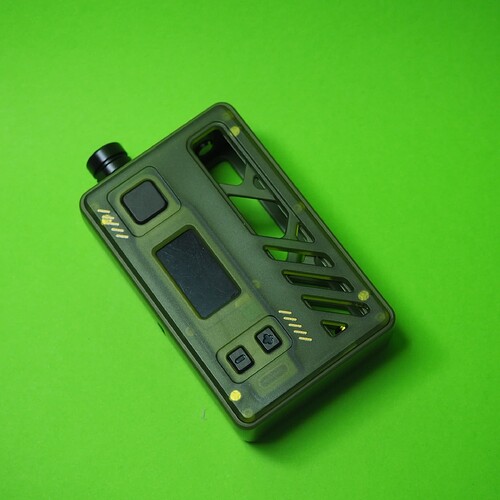
The mod is made of ABS plastic with a metal top plate section for the drip tip (internal bore 4.5mm), magnetic front and back panels.
-
Available in black, purple, lime green, pink, army green or blue.
- Wattage output 1-80 watts adjusted by 1 watt with round robin.
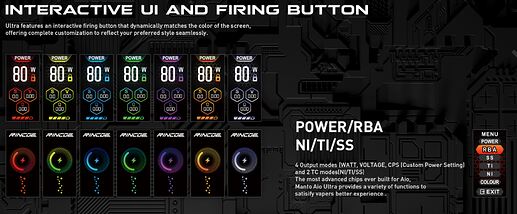
- Output modes:- Power, RBA, SS, Ti and Ni for TC.
- 18650 battery, 1A USB-C charging port with pass through.
- Coil resistance – 0.08-3ohm, non-adjustable positive contact.
- 0.96 TFT colour screen displays the mode, watts in Power/RBA modes, temperature in a TC mode, seconds puff duration, volts and a battery capacity bar.
- Clear PCTG tanks with generous capacities, Boro 5.6ml, stock coil 5.2ml.
- Size H80xW52xD27mm (without drip tip), weight 156 grams with rba and battery.
Manto AIO Ultra Design
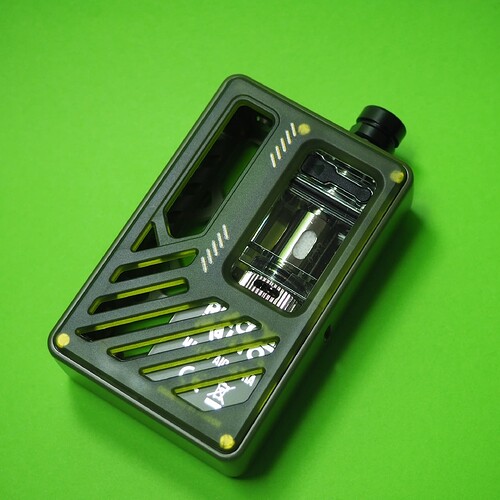
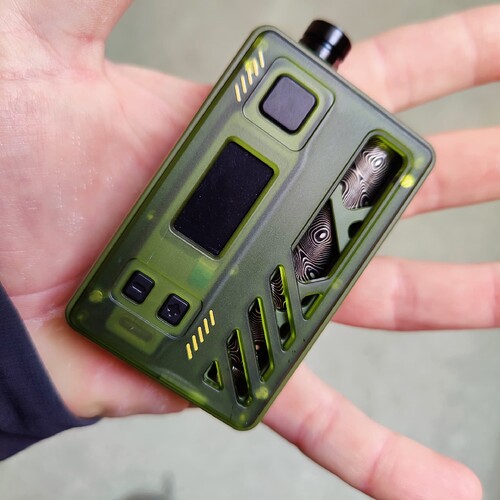
Yes, the device is made of plastic and the panels are held in place with 4 magnets on each side. I have found some moment in the panels in me review unit, mostly on the side that houses the Boro tank, but other than that here are no rattles. The panels have random grills cut out in them that I feel take away from the clean aesthetic look that I would prefer.
Up top, you have a metal top plate section for the integrated metal drip tip.
More angled cutouts on the side of the mod, this works well dissipating heat from the battery when vaping at high wattages. Thankfully, removing your battery is an easy process, by removing both panels you can simply push it out from the rear. Battery orientation is clearly marked on the inside. The integrated drip tip holds the tank in place well with smooth threading, it’s easy to undo.
I like the button layout, the fire button and up+down buttons are very clicky. The buttons are well-placed and don’t interfere with the airflow when holding in either hand. 5 clicks to turn the device on and 3 further clicks gets you into the menu where you can select from the 4 different output modes and colour of the fonts. The modes consist of Power/RBA/Ni/Ti/SS.
The screen is bright and clear and has a honeycomb style background. On there it displays what output mode you’re using, Wattage/Temp puff seconds, Voltage, coil Ohms and battery level bar indicator at the bottom. You can also lock the coil resistance and wattage adjustment. There is a USB-C port located below the display that can be used for updates or charging when you don’t have access to an external charger.
Stock coils
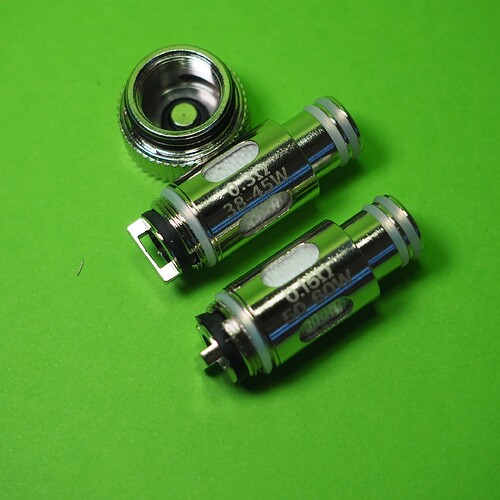
The stock coils screw into a housing that incorporates an adjustable AFC ring. They are a push to fit design and are easy to install in the stock coils in the PTCG clear tank.
First up, the 0.15Ohm mesh coil using a 70/30 PG/VG e-liquid and running the coils at 50 Watts to break it in. I was happy with how this coils performed, pushing it up to 60 Watts it produced a warm saturated vape with very decent flavour. With the AFC wide open it’s too airy, so I adjusted it to my liking. The stock coil tank has a 5.2 ml liquid capacity. This coil lasted into the 2-week mark before dropping off in flavour.
Next up, the 0.3Ohm coil. This coil produces a cooler vape, but still gives a decent vape with good flavour. Filling the pod can be a bit fiddly with the door on, best to remove it when refilling. I experienced zero leaking using these stock coils.
The Manto Boro Tank
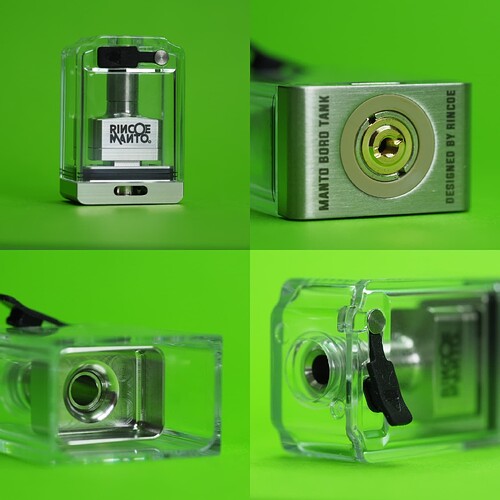
Next up the Boro tank with Manto RTA.
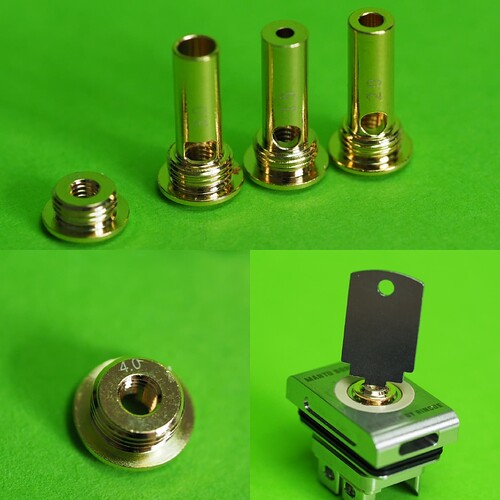
The Boro tank capacity is 5.6ml and is adorned with an even fiddlier tank plug to deal with when refilling. The chimney has a 4 mm bore with a slight dome at the bottom. On the bottom, you can swap out AFC pins on the fly. The RBA has a good rubber gasket that seals it snugly in the tank.
The Boro kit comes with a handy tool for removing the included 4 AFC pins
The Deck
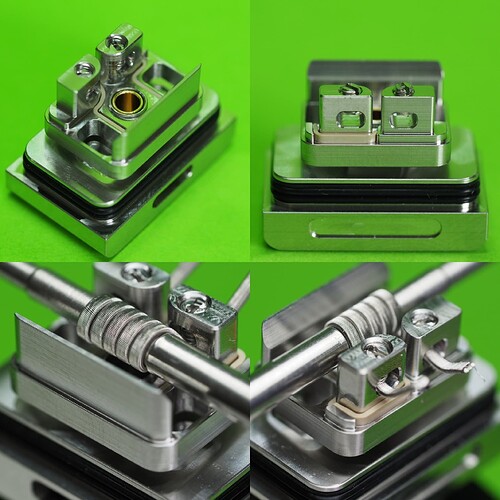
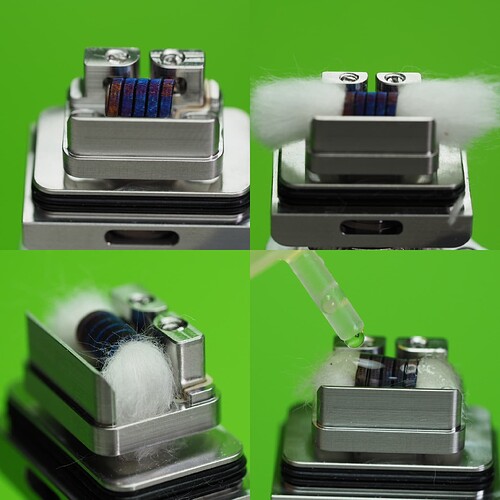
The deck consists of two posts design with very small flat post screws. The deck has good-sized wicking wells. The rear wall on the deck is to help direct the airflow around the coil. No included pre-made coils, so I decided on using a triple fused 3 mm Clapton for this build. The coil was easy to install through the large post holes, and no problems snipping off the protruding coil legs at the rear of the deck.
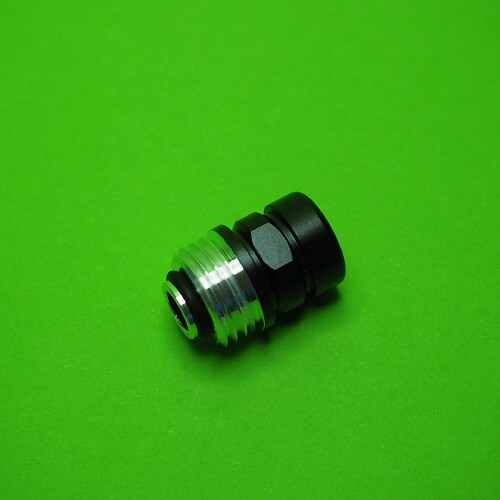
The Boro tank comes with a 510 threaded build adapter that screws into the AFC pin, which then screws on to a mod for pulsing and burning in your installed coils.
Build
The 3 mm fused Clapton came out a 0.27 after pulsing and strimming. Fluffed and trimmed the cotton and lightly tucked it into the wicking wells.
Performance
The Manto Boro tank performed well with my choice of coil. Running it at 45 Watts with the 4 mm AFC pin installed gave me a warm, saturated vape. And decent battery life for an 18650 mod. The Manto AIO Chip delivering fast ramp up and good performance consistently every time I press the fire button. I’m happy to use this setup in as my daily carry.
Final thoughts
The Manto AIO Ultra kit is a good all round package in my honest opinion. With the use of lightweight materials and a good chipset, this device is very adaptable. The Boro Tank performs as well as any other Boro that I’ve used in the past. And the stock coils provide a good leak proof vaping experience with decent longevity. From the price perspective, this comes in on the vape budget scale as good value for money compared to what you can spend on fancy boro mods alone these days. This piece of kit will do just as good as the rest.
I would like to thank Sourcemore for sending the Manto AIO Ultra over for review, and I hope you enjoyed reading my thoughts on this one.
