Hi Vaping Community, In this review I take a look at the Dead Rabbit R Tank from Hellvape. The Dead Rabbit R Tank was supplied for the purpose of this review by Fiona from Hellvape.
Dead Rabbit R Tank - Unique Rebuildable Mesh Tank-Hellvape - The DIY atomizer leading brand
Introduction
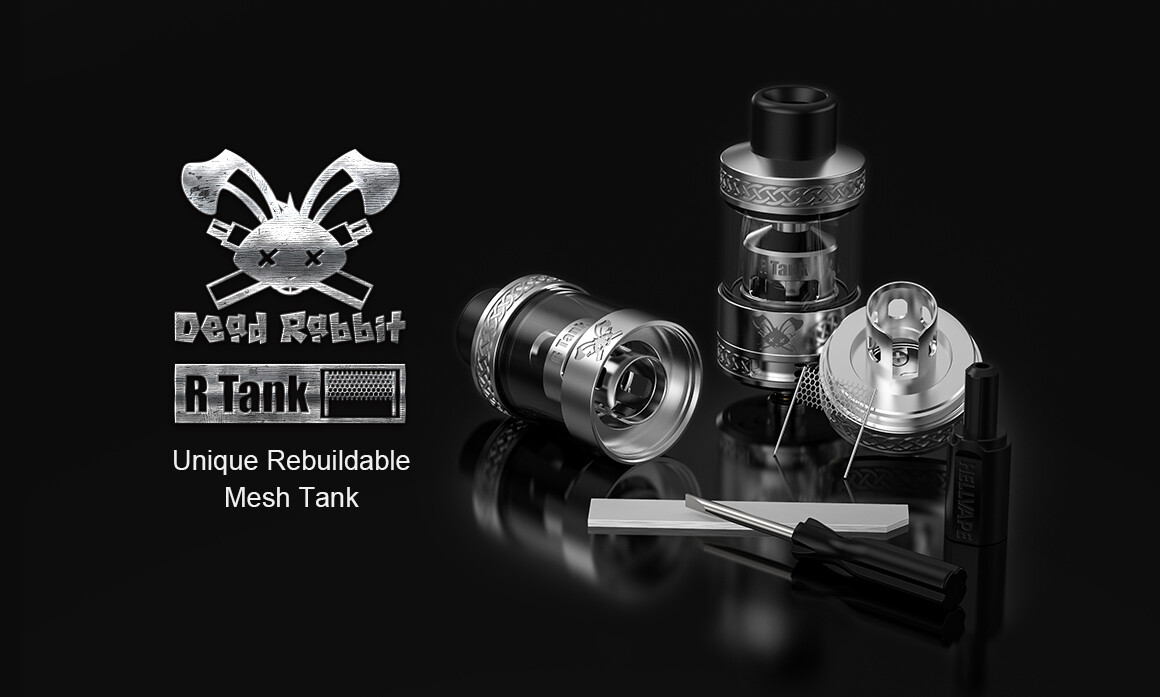
Hellvape are atomiser specialists that are best known for their cruelty towards rabbits although they claim no torture takes place and it’s a swift and humane death (it is a joke)! Here we have their latest Dead Rabbit the Dead Rabbit R Tank which is a Sub-ohm Tank, RTA Hybrid for want of a better description.
It takes the idea of the latest cost cutting trend of the rebuildable coil head and incorporates it into an RTA setting which is something very unique and innovative. With it’s dual split airflow and 510 drip tip fitting although fully open this gives a fair amount of air it’s going to also suit semi restrictive and RDL vapers, let’s give it a closer look!
Disclaimer: No Rabbits were harmed in the testing of this product or writing of this review!
In The Box
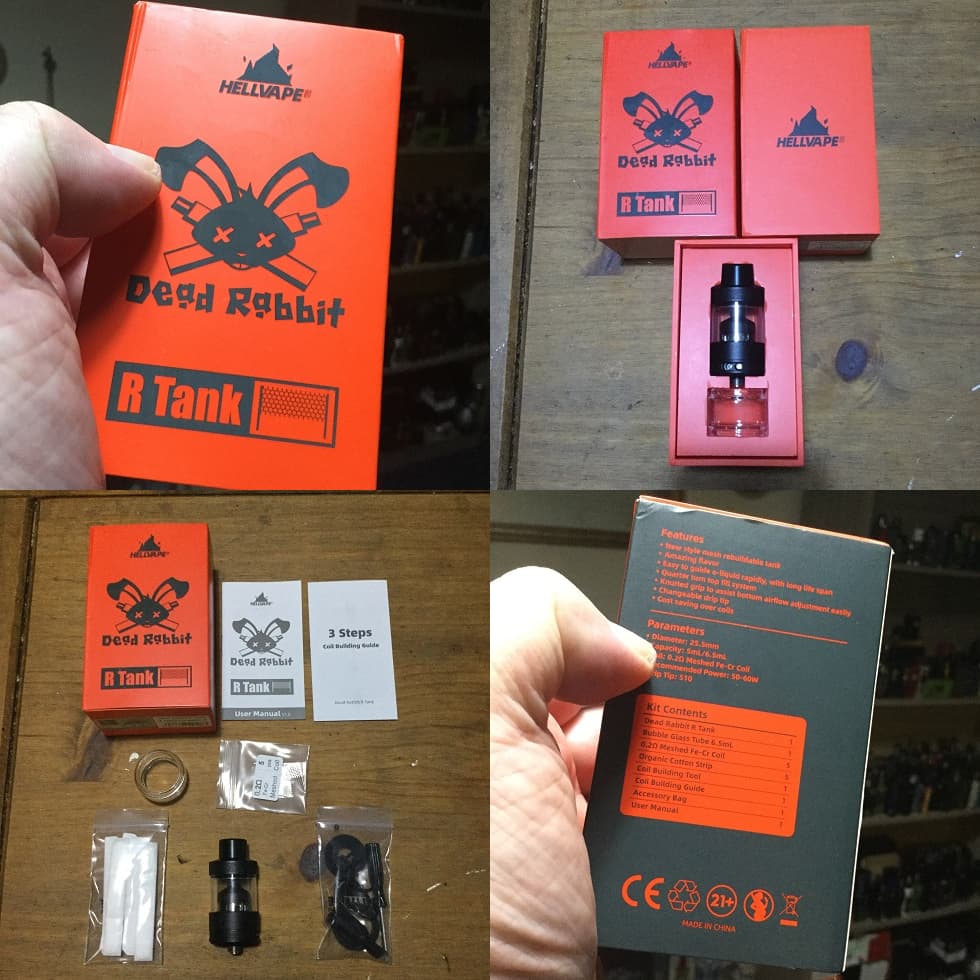
Contents:
1* Hellvape Dead Rabbit R Tank 5ml (2ml TPD)
1* Bubble Glass Tube 6.5ml
5* 0.2Ω Mesh KA1 Coil
5* Organic Cotton Strip
1* Coil Building Tool
1* Accessory Bag
1* Quick Coil Building Guide
1* User Manual
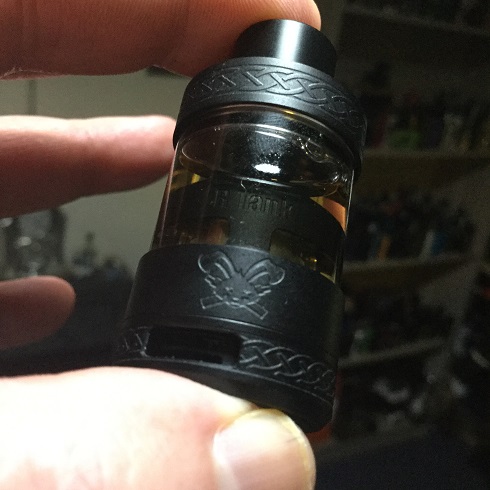
Aesthetics
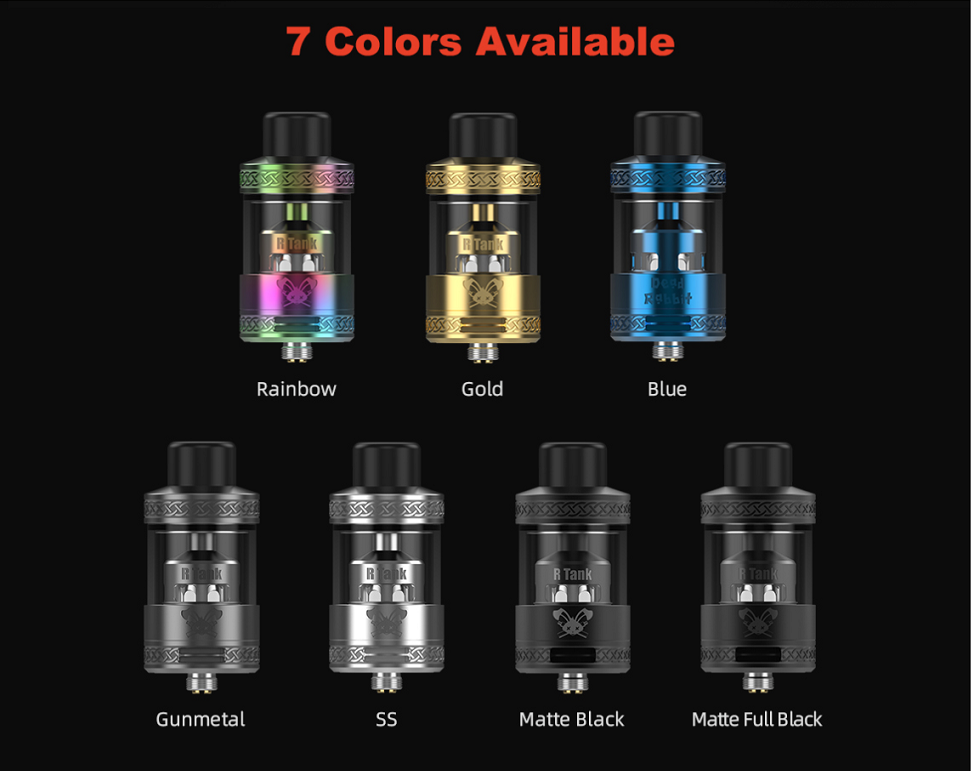
The R Tank came in Orange cardboard box packaging with outer Orange cardboard sleeve, on the front we have branding and on the reverse contents, specs, etc! I received the Matte Full Black version, the options are Rainbow, Gold, Blue, Gunmetal, SS, Matte Black or Matte Full Black!
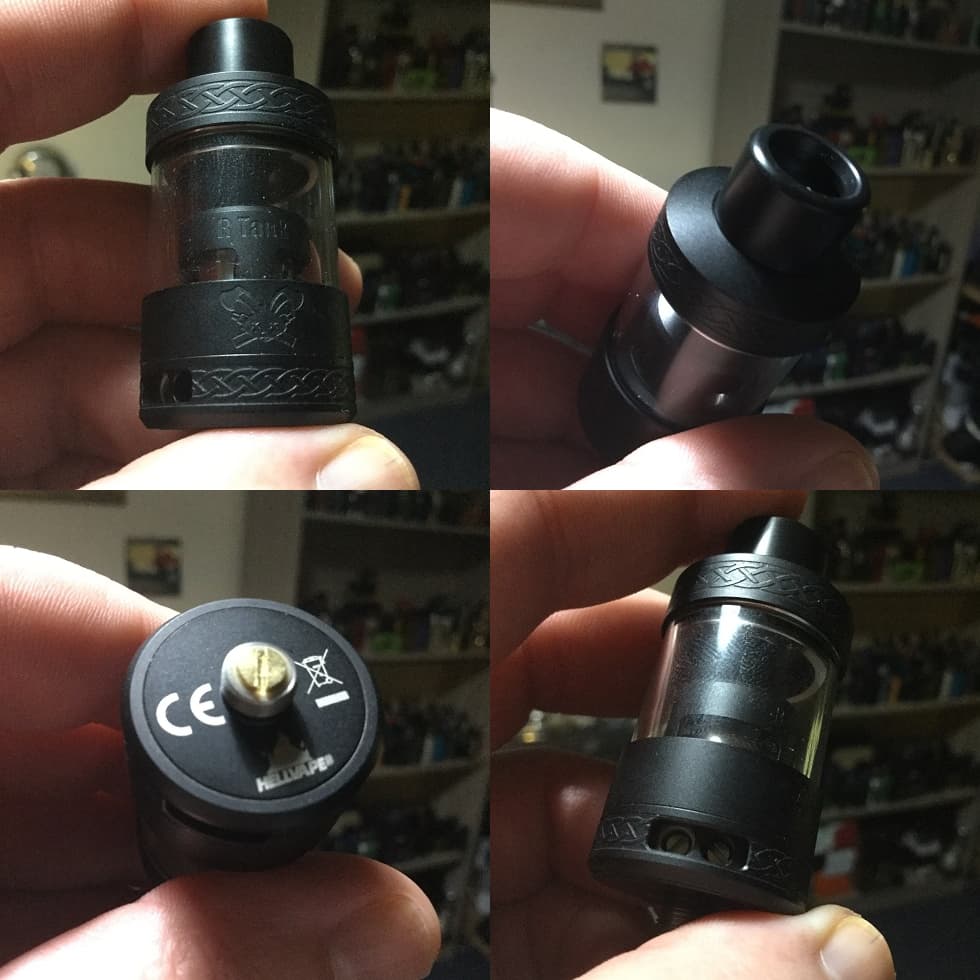
Up top we have a top-cap which inclines up to a 510 fitting Delrin drip tip, the outer edging of the top-cap has some really nice raised Celtic Knot decoration which also serves a practical service in the way of grip. Through the glass we can see the chamber with “R Tank” engraved into the surface and generous wicking ports, the shape of the chamber definitely gives this more of an RTA rather than Sub-ohm look! Due to the nature of this having a vertical mesh build within a shell which takes up room we have a large metal section between the glass and the base, this section has “Dead Rabbit” in fancy font carved into the metal one side and a carved “Dead Rabbit logo” the other. We then have the base section with AFC, the AFC has the same raised Celtic Knot design as on the top-cap which helps with grip when turning, we have dual slot airflow! Looking at the base we have safety stamps and a bit of branding, the 510 is Gold plated and protrudes nicely!
All the threading and tolerances are spot on and in my subjective opinion it’s an handsome looking atomiser coming in a colour to suit everyone!
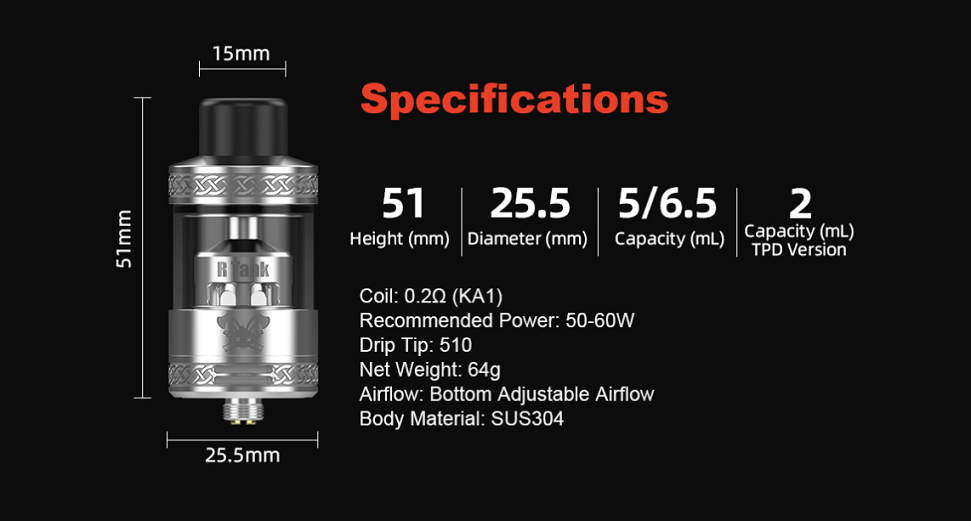
R Tank Specs and Features:
Size: 25.5* 51mm (At base 24mm)
Material: SUS304
Capacity: 5ml /6.5ml (2ml TPD)
Resistance: 0.2ohm KA1 Meshed Fe-Cr Coil(50-60W)
Drip Tip: 510 drip tip
Innovative Mesh Coil Rebuildable Tank
Quarter turn top fill system
Bottom adjustable airflow
Classic Celtic knots design
Cost saving accessories packs available (will make 10 coil builds)
Thread: 510
Colours: Rainbow, Gold, Blue, Gunmetal, SS, Matte Black, Matte Full Black
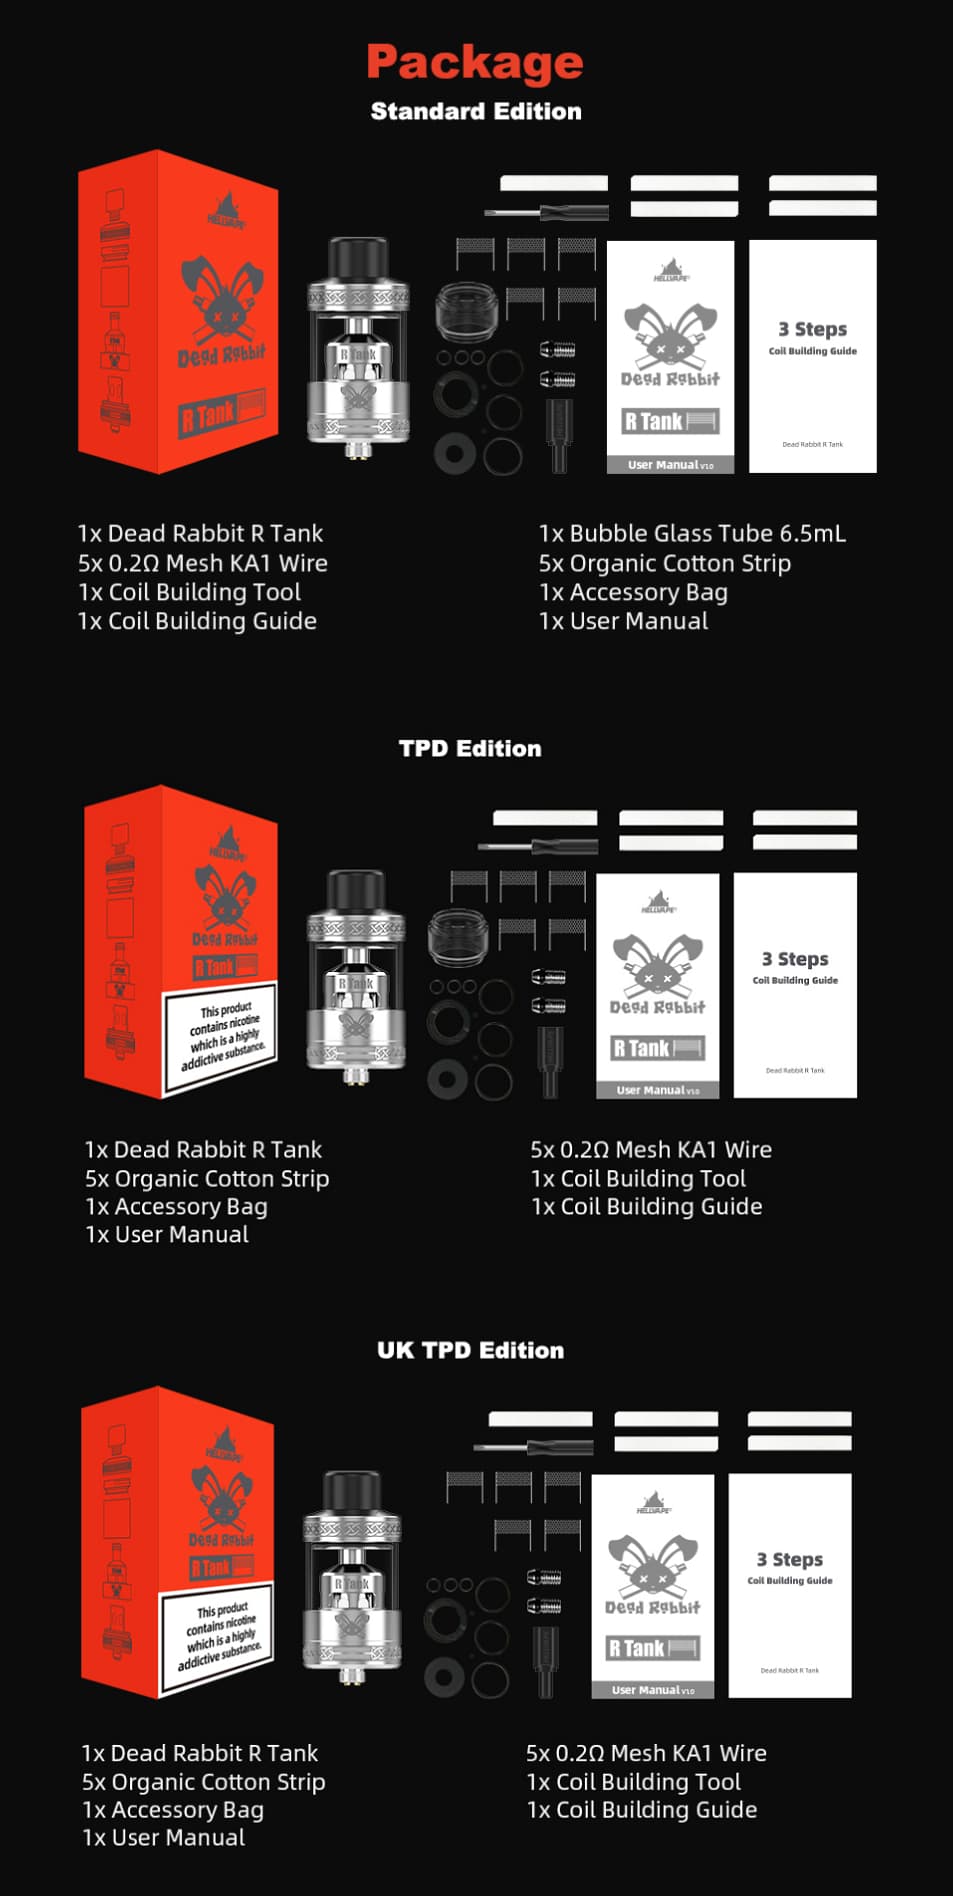
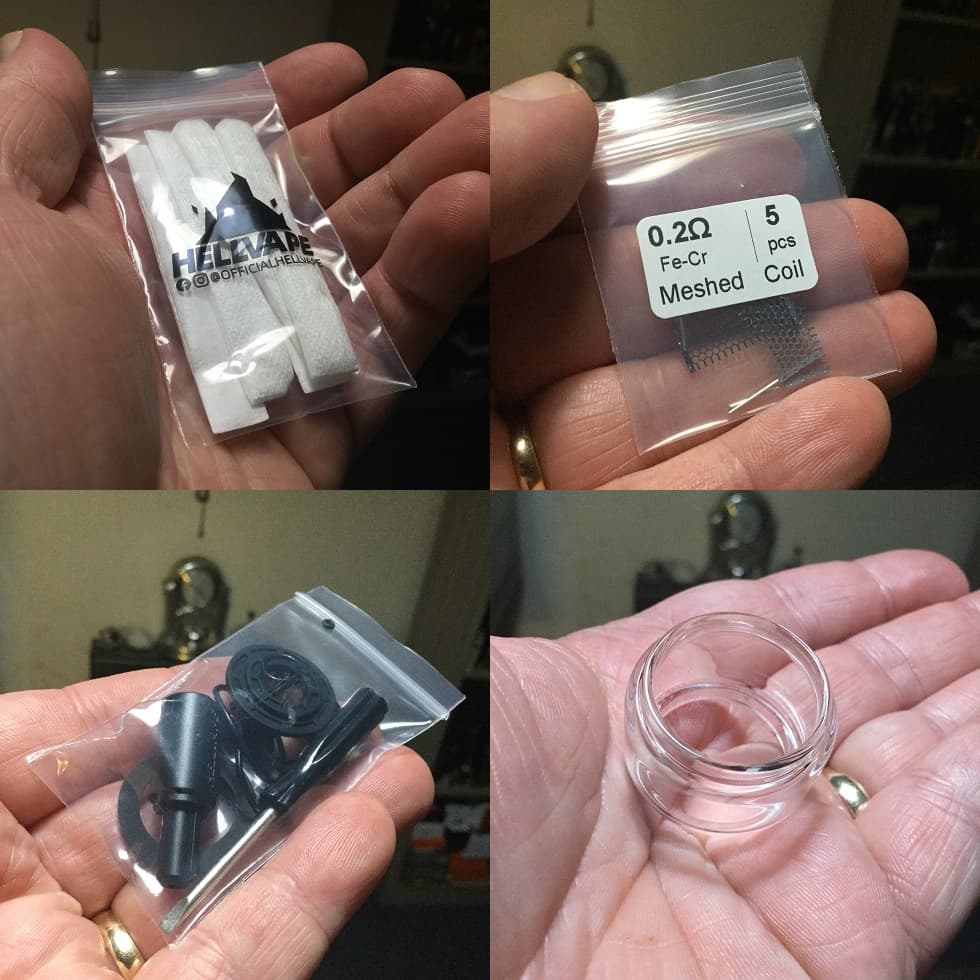
What You Receive?
You receive the R Tank with 5ml straight glass (2ml TPD) and also a 6.5ml alternative bubble glass! You also receive 5 pre-cut strips of cotton, 5 strips of mesh with attach leads and a coil building tool which essentially is for bending your cotton and mesh assembly around for inserting into the coil head section of the deck. You also receive a bag of extra O-rings, a quick building guide and full manual.
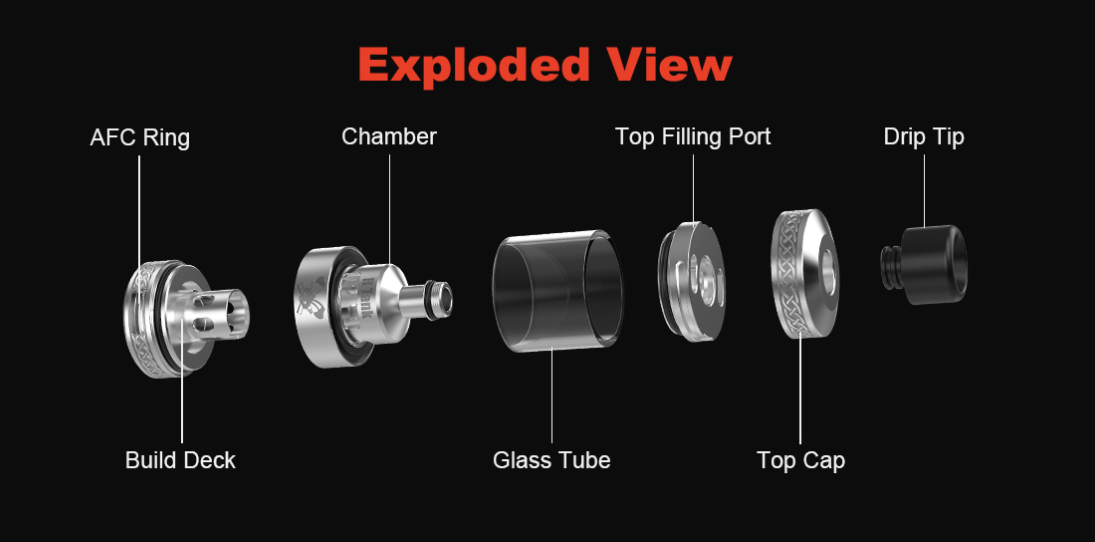
It’s Various Parts!
Up top we have a 510 fitting Delrin drip tip, I can see the argument for a 810 and then a 510 adaptor being supplied giving the choice but with the size of the airflow slots, them being split and chimney bore not being the widest this seems optimized more for a semi restricted vape rather than full on DL without restriction, keeping the RDL vapers interested and after testing the R Tank for me the wide bore 510 is a good choice!
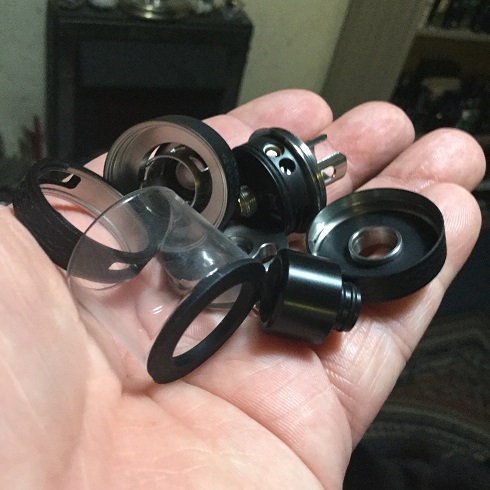
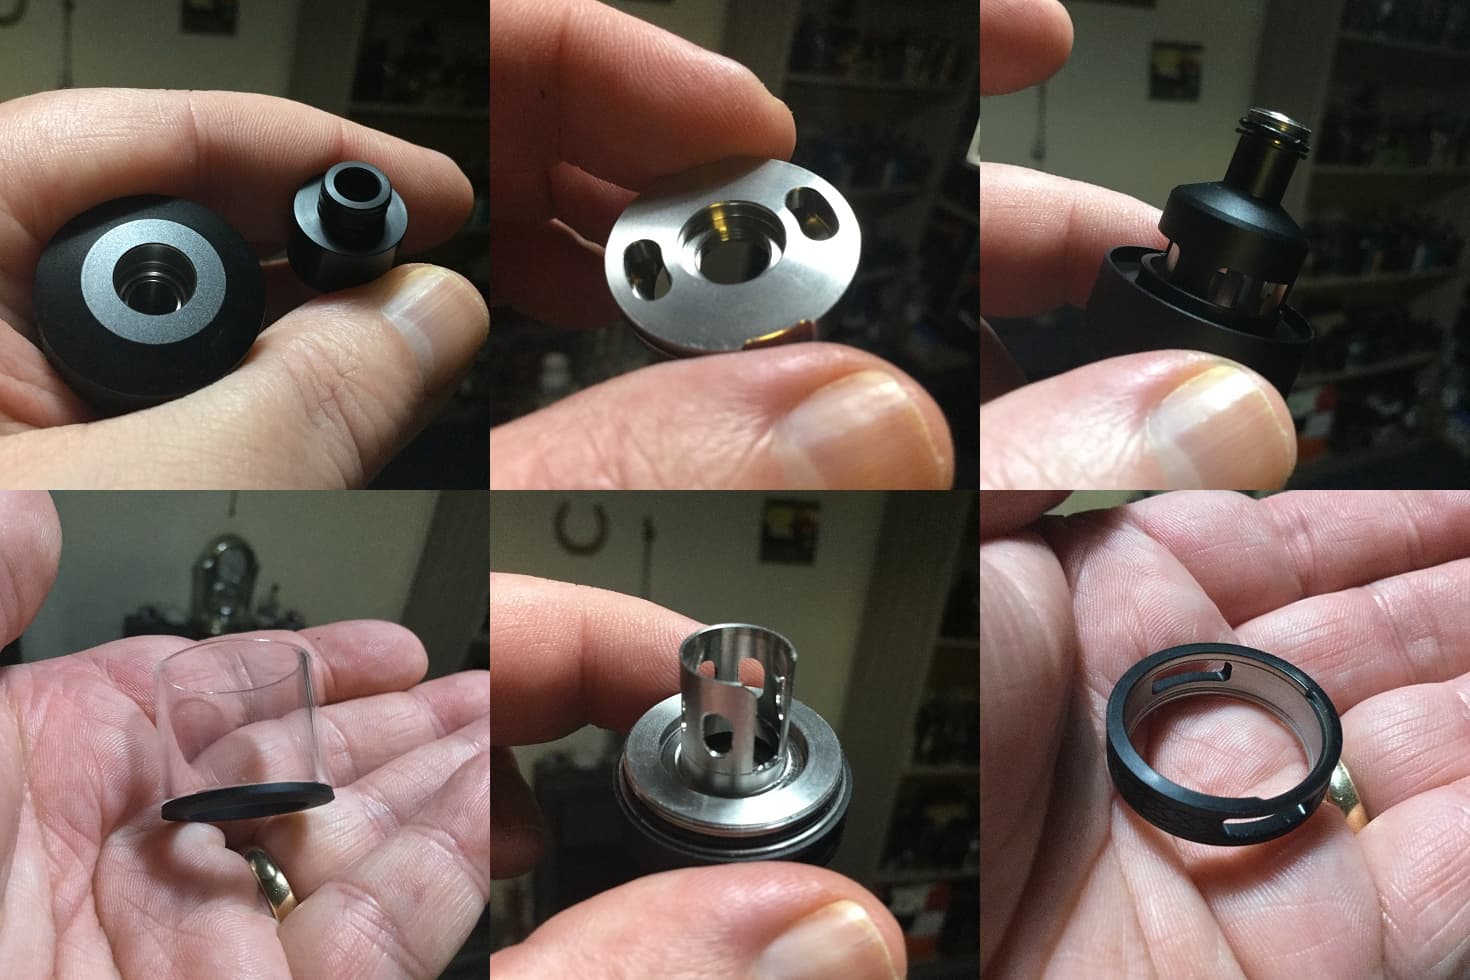
We then have the fill plate with fill ports which unscrews from the chimney part of the chamber section, this needs to unscrew to release the glass which sits on the extended base section of the chamber, it’s sealed top and bottom with O-rings and the alternative 6.5ml bubble glass can be fitted if you prefer! Looking inside the chamber with chimney section is quite interesting, the inner chamber is actually the outer shell of the coil head assembly, like the outer shell of the SMRT coil but within a chamber structure, the outer chamber has wicking ports to feed the coil head and is stepped to the chimney which sits immediately above the coil head shell!
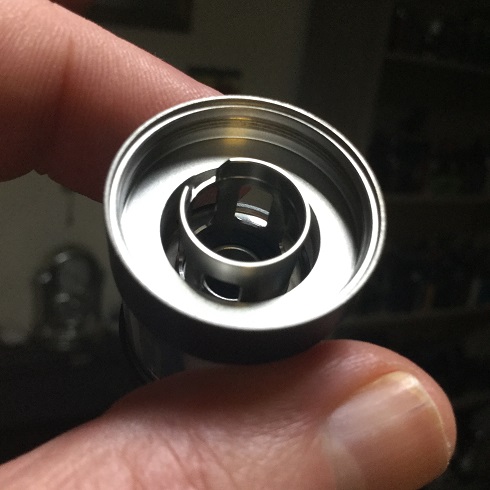
The chamber does have a condensed RTA look about it but it’s really aesthetic as the vapor will go directly from the top of the coil into the chimney! The base section sees the deck which has the inner shell of the coil head and two large terminals below, the AFC does have stoppers but can move much further one way to also allow the terminal screw heads to be unscrewed and tightened without removal!
Filling
The top-cap has an interesting fitment, it works as quick as the bayonet style but without the need of the downward pressure before turning. Either side on the inside perimeter of the top cap we have a tab, then either side on the outside perimeter of the fill plate we have a notch for those tabs to fit into and then a rail going one way, each rail goes in opposite directions so just the slightest turn and the tabs travel along the rails to secure the tank! Although I had no issues at all when filling it does need pointing out the fill ports are not big by any means so you could have issues if using large nozzles!

Airflow
The airflow works just like dual bottom slots on a sub-ohm tank but the AFC is allowed to be turned further in one direction before hitting the stopper to allow the decks terminal screws to be accessed without AFC removal, although personally I did remove it when building the coil!
The slots are not long but are quite wide with a split airflow so the outer slot lines up with two very narrow slots instead of a matching wide single slot! I do wonder if it was done like this because the slots on the AFC were wider than they wanted to also allow access to the terminal screws so went for the split airflow to restrict the airflow intake!
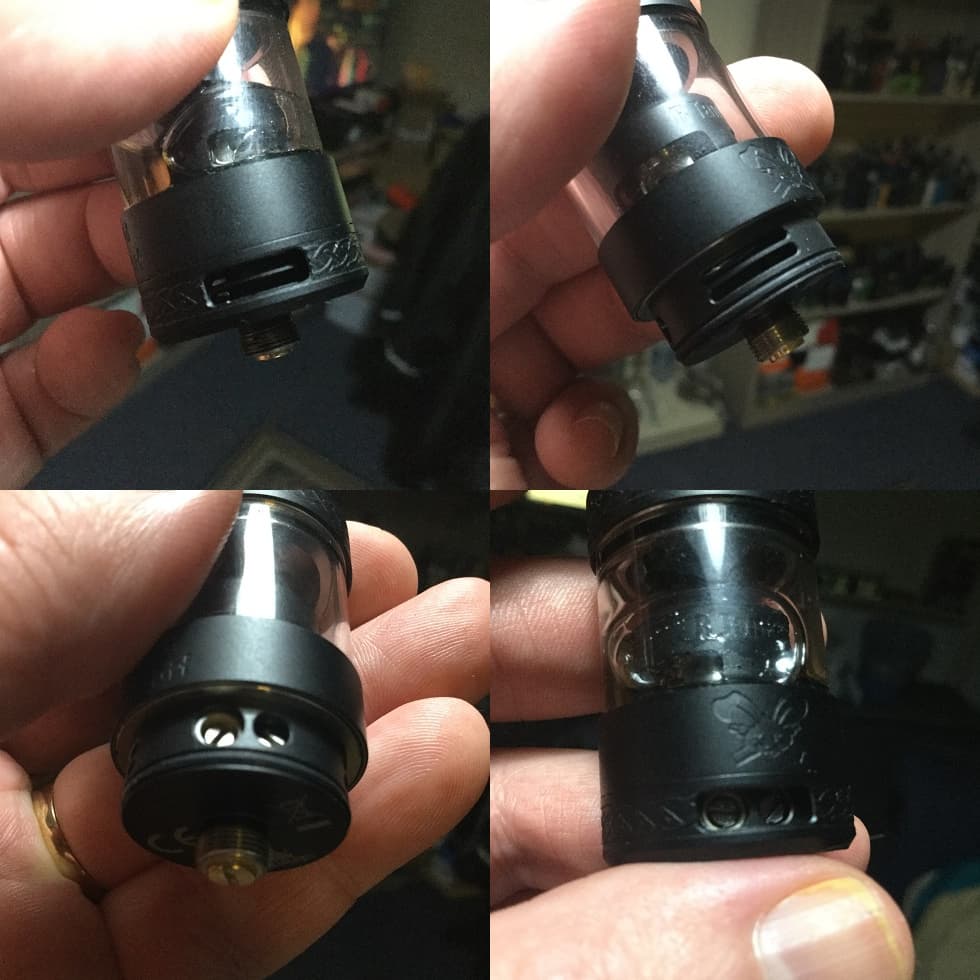
The AFC has that raised Celtic Knot decoration for good grip and moves with a nice tolerance, the air comes through the slots and up through the centre of the coil head from below.
The Deck And Build!
Wow the graphic below states the build can be done in 15s, it takes me that long just to unscrew the terminal screws and to be honest however much fun and easy this is to build I recommend taking care to do a good job, 3 to 5 mins start to finish is more realistic although doing it half with one hand so I could take photos maybe take a minute off that!
The deck has two large terminals in it’s base and the screws get unscrewed and tightened from the outside of the base with or without the AFC present, whichever you prefer!
In a vertical position above the terminals we have what can only be described as the inside shell of a sub-ohm rebuildable coil (like a SMRT coil) but fixed in position. First you need to undo the terminal screws so the large terminals are wide open. You then place one of the mesh strips with leads facing downwards on the centre of the cotton with the cut corner of the cotton to the top left, the outside of the cotton has a silky coating which I have no idea what it is but you do not remove it! You then place the lower (smaller in diameter) section of the coil building tool onto the centre of the mesh and bend the mesh and cotton around the tool!
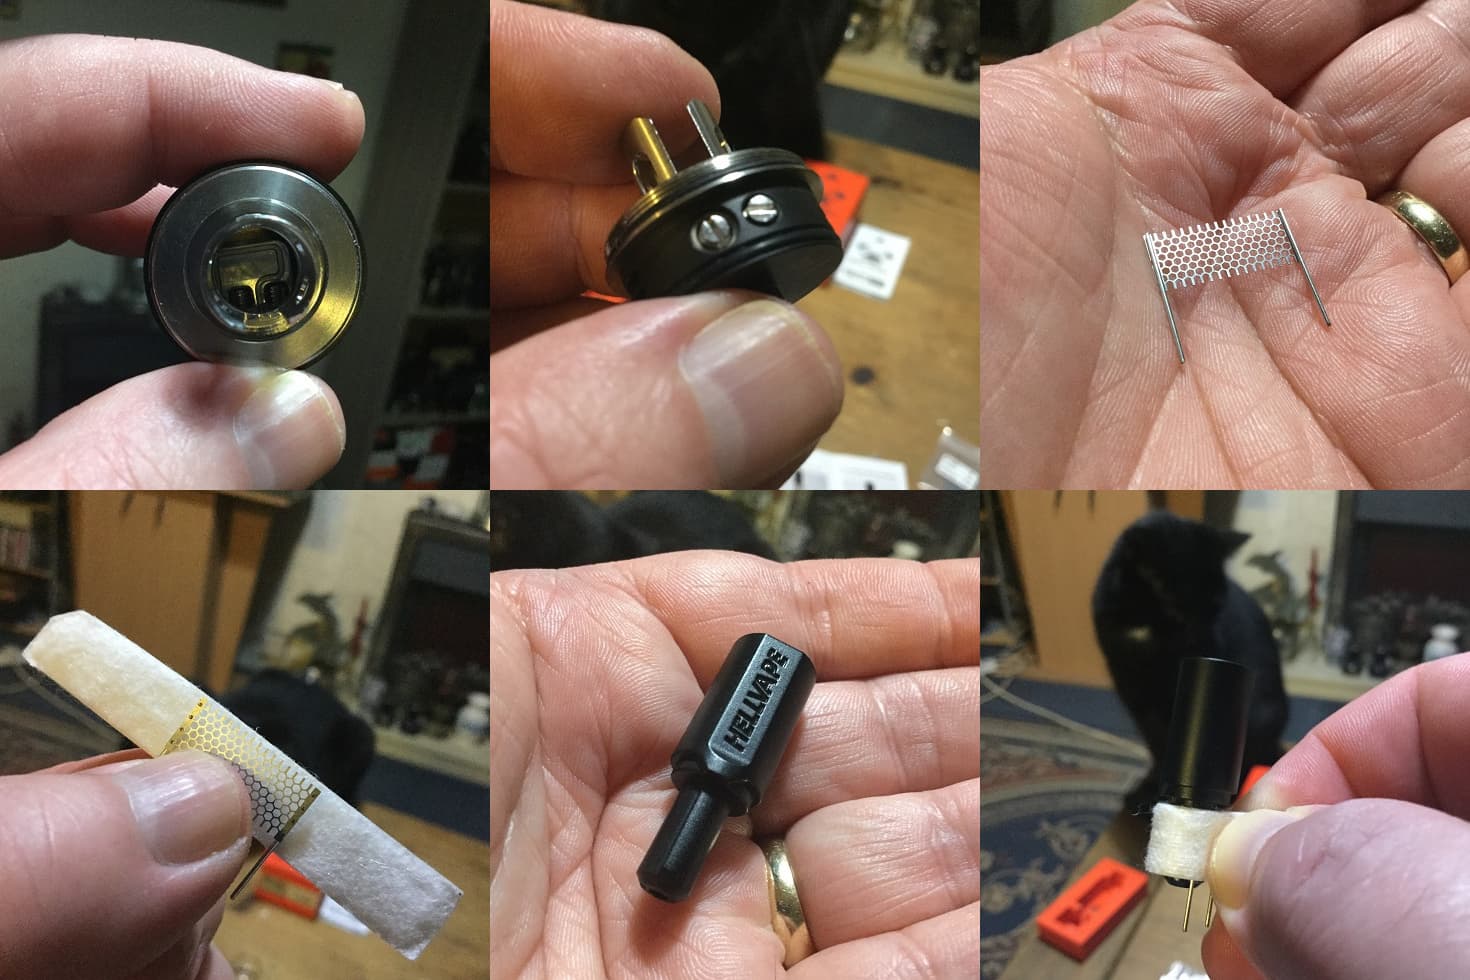
When you look at the coil head structure fitted to the base like with the SMRT coil inner shell we have an open slot which allows the excess cotton to slide through as the mesh/cotton/tool assembly is lowered in position. Before lowering the assembly into the coil shell make sure the leads are lined up with the terminal openings as once the assembly starts to be lowered into the shell in this regard you will be blind!
Once the mesh/cotton/tool is in position I would first tighten your screws and check the resistance, although it is simple and the terminals are large as mentioned as far as the leads going into the terminals is concerned after initially lining them up you are blind in regard the leads but by checking the resistance before cutting your excess cotton if you are unlucky enough for one of the leads to not find it’s spot or both go into the same terminal you will still be able to save the build by simply lifting out, relining up the leads and sliding back into the coil head shell! Mine went straight in no problem but to check a rebuild was possible I unscrewed my terminal screws lifted the building material assembly out and re-installed and it was as good as the first time, neither the mesh or cotton got damaged! Once happy trim the excess cotton, remove the tool, prime up and give it a few pulses to admire your work!!

You then line up the outer shell which sits in the chamber to the now built inner coil head and lower before screwing the tank together, fill and enjoy!!!
Buying Extra Mesh And Cotton
You receive 5 0.2ohm Kanthal mesh strips and 5 strips of cotton which is excellent, you can also buy the same in packs of 10!
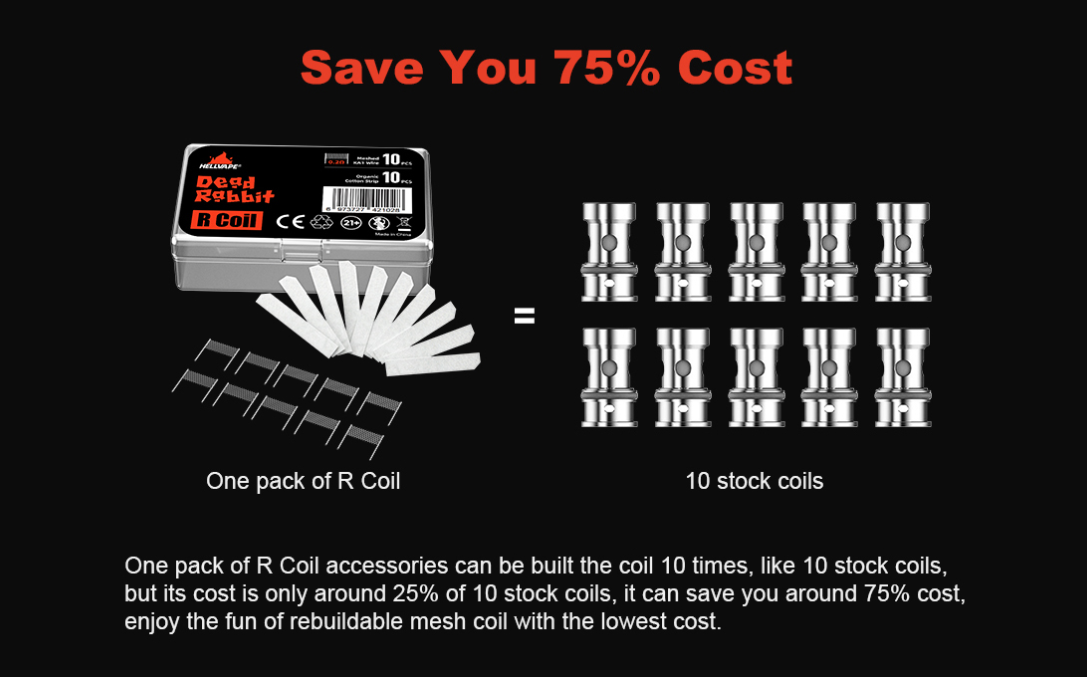
I do hope they will release different variants of mesh and also no doubt even as I write this some will be on the hunt to find out if anything previously released will also fit!
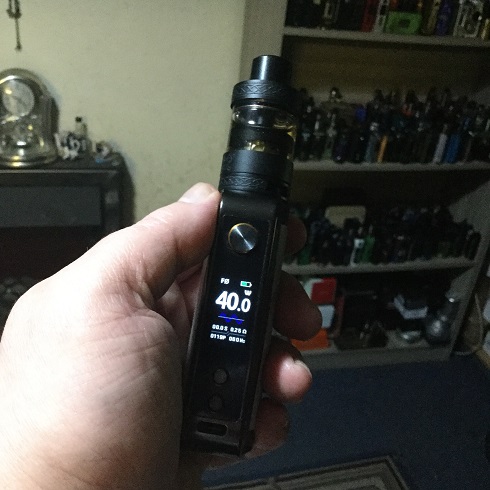
How It Vapes And My Thoughts
I usually do have quite a few cons but not on this occasion, the fill ports could be bigger, although the 510 suits I suppose they could of allowed the option of also an 810 and wish there was more than just one resistance mesh available but the latter will probably be addressed in due course, then it’s pros all the way!
Although 15s is a joke this is so easy and fun to build, I also like the innovative idea of taking the rebuildable coil head and fixing it into an RTA setting! That split airflow does add both restriction and smoothness, in fact this is the smoothest rebuildable mesh tank I have used and I have used all the profiles and profile copycat atomisers, I suppose it could be argued it should be more compared to sub-ohm mesh tanks but even here I find it superior in regard this is comparably smoother and much quieter!
Fully open and I wouldn’t argue with the 50 to 60w rating but liking restriction I had the airflow less than half open which allowed just 40W for the same warmth and flavour I was getting at 55W fully open. Although this does have some restriction fully open it still gives enough air for most but the split airflow seems to come into it’s own when closing down allowing for much more restriction than you would expect from either a mesh sub-ohm tank or Mesh RTA!
I love the quick release top-cap design and I find it very pleasing to the eye aesthetically. All tolerances and threading are spot on and full marks for what is included, including concise instructions which is good to see, finally at just 24mm at it’s very base this will look good on almost anything!
Apart from MTL RTA’s with one or two exceptions nothing else stays in my rotation but this will be joining that club, I haven’t enjoyed using a non MTL RTA this much since the original single coil Zeus RTA!
Likes
Very good build quality
Aesthetically pleasing to the eye (in my opinion)
Threading and tolerances all spot on
7 Colour options
Quick release top-cap
Innovative coil shell build deck
Build very easy
Very large terminals
Access to terminals with or without AFC
Adjustable split bottom airflow
Very smooth, flavour banger
DL (with some restriction), Semi restricted and RDL
5ml capacity (6.5ml with supplied bubble glass)
Concise instructions included in form of both manual and quick coil building guide
5 Mesh strips and 5 cotton strips included
Mesh + Cotton available in packs of 10
Coil building tool included
Cons
Small fill ports (big enough for most nozzles)
Not an 810 drip tip option
Only one variant of Mesh available to date
I would once again like to thank Fiona from Hellvape for supplying the Dead Rabbit R Tank for the purpose of this review, thanks for reading and stay safe!
Dead Rabbit R Tank - Unique Rebuildable Mesh Tank-Hellvape - The DIY atomizer leading brand